Curve Remap Anim Node
This node applies the values from one set of curves to another set of curves. This is sometimes useful for testing systems that use different names together. For instance, if you are using a facial capture system that uses a set of curve names that don’t match the curve names on your character’s face, you can use this mode to quickly match them up without having to modify one or the other.
Using the Node
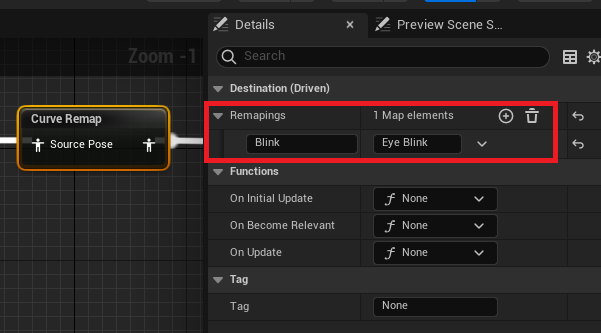
Add a Curve Remap node to you Anim Blueprint after the node that brings in the source curves. In this case I’m using a Curve Blink node to drive the Blink Curve, but the character has the morph named Eye Blink instead.

In the Details for the node add an entry for each curve you want to remap. In this case I’m remapping the curve Blink to go to the correct curve on my character Eye Blink.

The Settings
Remapings – The list of curves to remap. The value of the curve on the left will be applied to the curve on the right.
Recent Comments