FaceFX to Unreal– Transferring a Character to Unreal
To use FaceFX with the FaceFX to Unreal plugin you’ll need a character that either has a set of morphs or a pose asset matching the FaceFX curves.
Most likely you already have a character in Unreal and don’t need this section. This example is going to use a Genesis 8 character which comes with Daz Studio. Since you can get example assets for testing free, and I’ve added a button for exporting the needed morphs easily. You can get Daz Studio here: https://www.daz3d.com/daz-studio-4-pro. You’ll also need the Daz To Unreal Bridge (https://www.daz3d.com/daz-to-unreal-bridge).
- Create a Genesis 8 character in Daz Studio. I would keep it simple to start. This is the character that comes with the starter bundle.
2. Open the Daz to Unreal dialog. Choose File -> Send To -> Daz to Unreal
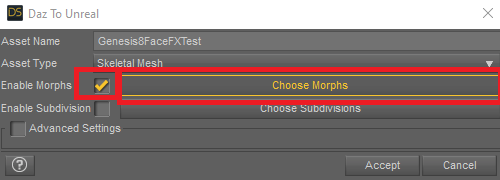
3. Check Enable Morphs and click the Choose Morphs button.
4. In the Morphs dialog click FaceFX(Genesis8) to auto populate with the needed morphs, then click Accept.

5. Noe click Accept in the Daz To Unreal dialog to send the character to Unreal.
Recent Comments